Part Four
CONSTRUCTION DRAWINGS AND NOTES
Revision: Ferbruary 2023
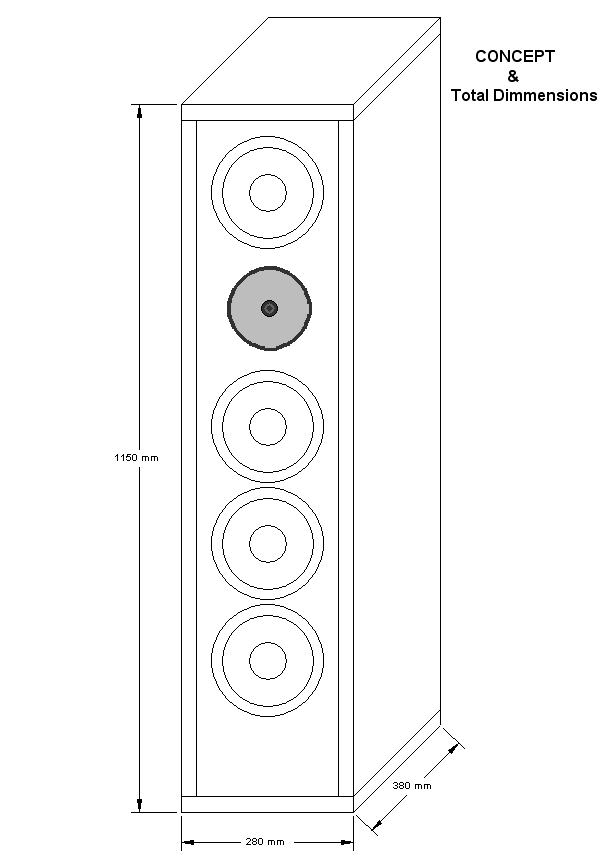
Elsinore Mk-6 - "MFC" & "NRXC" Versions
Please note "ULD" Version has different driver
cut-outs
The drawings below show the Crossover as now being internal and fitted to
the base of the box. For those who wish to do it differently, the changes
you make to the box to make the Crossover external, that is up to you.

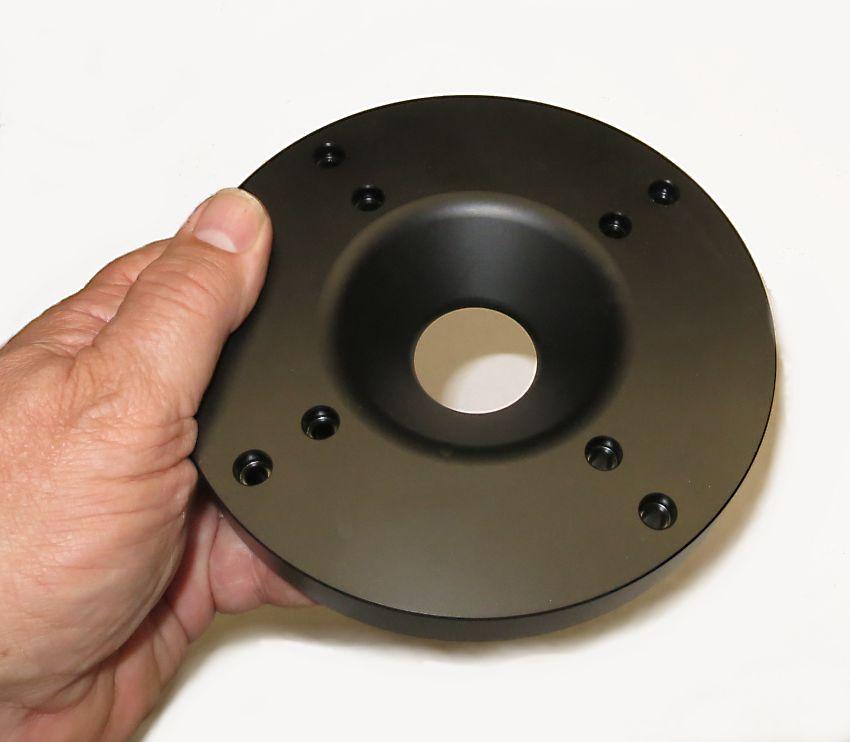
You can make your own Waveguide, but best to order it.
Use PayPal Link below, it should also accept Credit Cards:
PayPal Me AUD $190
(pair)
Also available: Crossover PCB email:
joeras@customanalogue.com

3D MODEL
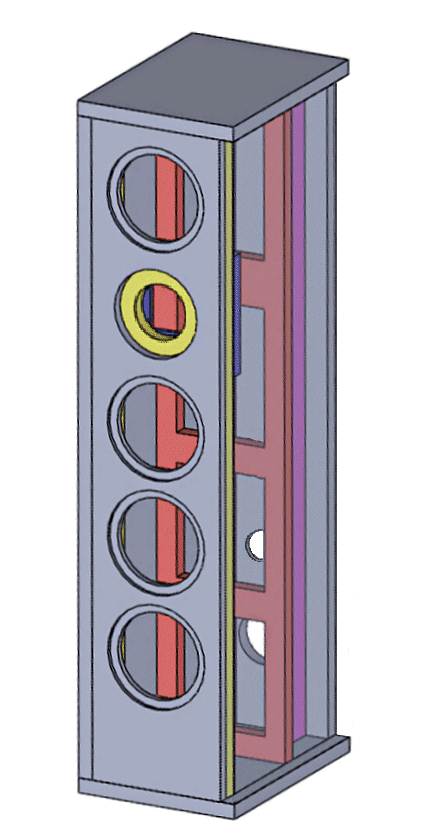

This now needs to prepare as per next description
SEE BELOW: Note different cut-outs for drivers
"ULD" "MFC and "NRX"
The Driver and Waveguide Cut Outs For Mark 6
"MFC
and
"NRX" are the same:

"ULD" VERSION BELOW:
These are different, please do not confuse.


This is added to the rear of the Sub Front Panel.
Cut-Outs must be
precisely in the centre and lineup with the Tweeter on Sub Front Panel.

FINAL LOOK OF ASSEMBLED FRONT OF BOX

The Main Brace sits 170mm behind the Sub Front
Panels. Later we will show what part of the volume will be treated with
Wool/Dacron Bats.
NOTE: There is a TOP and Bottom - so orientate in
the box as shown.
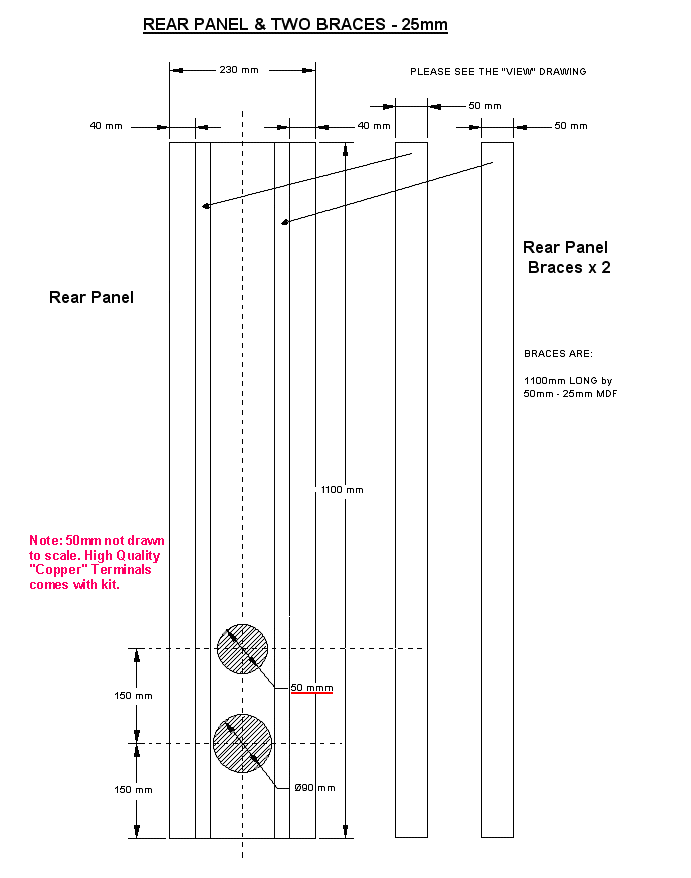
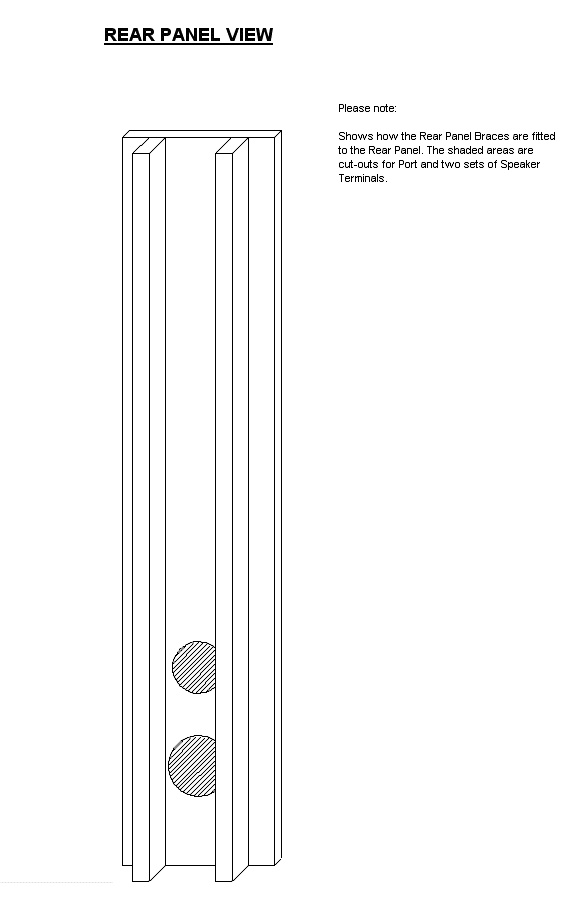
IMPORTANT: IF you are using different types of
terminals, then do these Cut-Outs accordingly. Same applies to 90mm Port
Cut-Out, this "OD" outer diameter. This may need to be changed, so check
that the outside diameter of your port you will be using.
Speaker Terminals hole is shown as 50mm Diameter -
adjust to fit to what you are using.

The Main Brace sits 178mm behind the Sub Front
Panels. Later we will show what part of the volume will be treated with
Wool/Dacron Bats.

Post Box Construction:
After the box has been assembled, then use plenty of white wood glue as a
sealant. Use your finger by running glue up and down on all internal joins. This
will ensure that joins are air-tight.
Some may question why a vented box should be air-tight when it has a dirty
big vent there. Surely any pressure would escape there rather than gaps in
the woodwork. This also means that we don’t understand how a
Helmholtz resonator works. At the box frequency, when the cone moves in, so
also in the vent the air is also moving in. Both the cone and the vent is
pressurising the internal volume. In fact, the pressures in a vented box are
potentially larger than those of a sealed box. So, bottom line, make sure
that only air in the vent can get in and out of the box.
Other than that, if you have DIY experience, the rest is doable. Please
note, this is a sizeable box of considerable mass, so if you have a bad back
or not prepared to lift some weight, then beg off or get a friend or other
to help. The finished boxes are likely to be 40-50Kg each.
The internal of the box will be stuffed with 60/40 Wool/Dacron bats made by
Insulco (although Bradford makes them too). About fourty to fifty percent of
the volume will be covered. The stuffing will be kept away and not to close
to the rear of the drivers, especially the two top ones. Some experimenting
may be needed, but this is excellent material that breathes a great deal and
has low mass. The Dacron (polyester fibres) keeps the 60% wool as a binding
material and becomes a ‘slab’ about 75mm thick. It’s very easy to work with;
gives excellent results and non-critical as well. Can’t ask for more.
Next: Internal Wiring & Box Damping
Use this PayPal Link, in most cases accepts Credit Cards:
PayPal AUD $190
Next: Internal Wiring & Box Damping
|